Web Server Account Migration
The following steps describe how to manually change the web server account after XIA Configuration Server has been installed.
WARNING: This process is not recommended, the installer should be used to assign the web server account.
- Ensure you have a full system backup of the server.
- If you wish to use a custom account, create the user account that is to be used as the web server account following the guidelines in the web server account section.
- Add the web server account to the IIS_USRS group. This is not necessary when using the Network Service account.
- Open the Internet Information Services (IIS) Manager tool, and stop the XIA Configuration application pool.
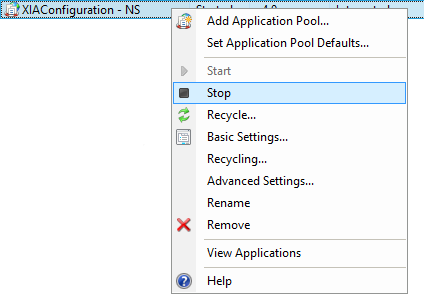
- If you wish to use the Network Service account ensure that application pool is named "VirtualDirectoryName - NS", renaming if necessary.
NOTE: You will have to reassign the XIA Configuration application to a different application pool temporarily while renaming. - If you wish to use custom account ensure that application pool is named "VirtualDirectoryName", renaming if necessary.
NOTE: You will have to reassign the XIA Configuration application to a different application pool temporarily while renaming. - In the advanced settings of the application pool modify the Identity property.
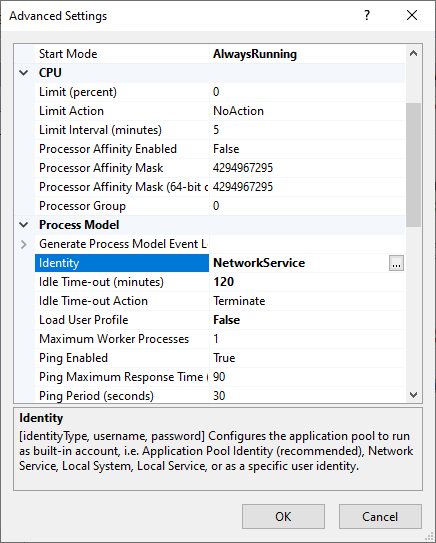
- Set the credentials for the web server account or select Network Service from the built-in account drop-down.

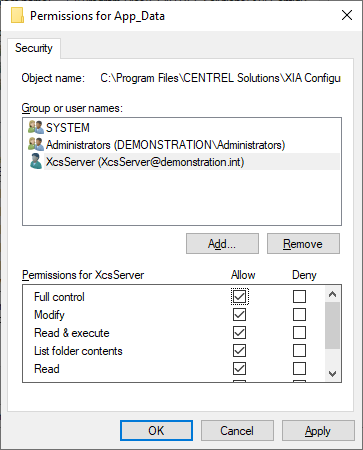
- Modify the NTFS permissions on the App_Data directory, this is located by default in the following location.
C:\Program Files\CENTREL Solutions\XIA Configuration\XIA Configuration Server\App_Data - Remove the previous web server account from the access control list, and ensure that the new web server account has full control.
- Open Regedit and locate the following registry key
HKEY_LOCAL_MACHINE\SOFTWARE\CENTREL Solutions\XIA Configuration Server\Setup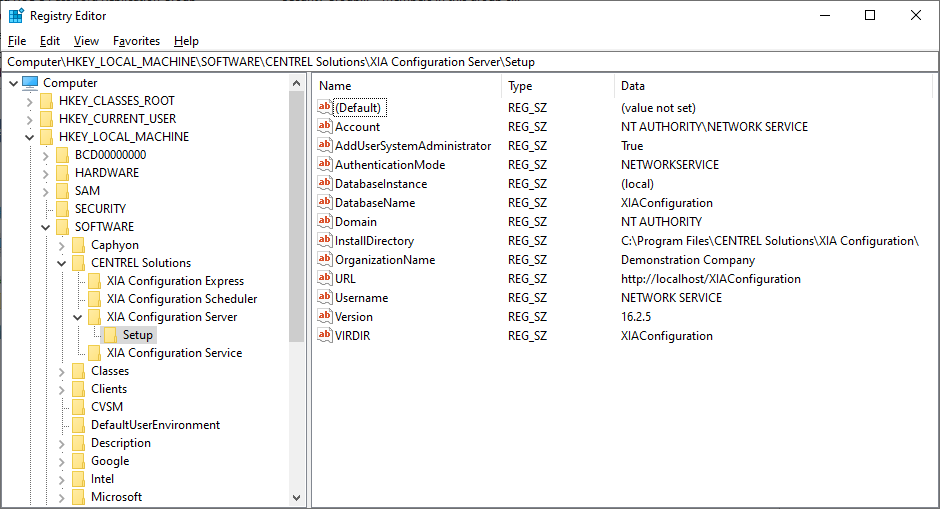
- Set the AuthenticationMode value to "NETWORKSERVICE" when using the Network Service account, or "CUSTOM" when using a custom web server account.
- Set the Account value to be "NT AUTHORITY\NETWORKSERVICE" when using the Network Service* account, or the full account name of the custom web server account**.
- Set the Domain value to be "NT AUTHORITY" when using the Network Service* account, or the domain name of the custom web server account**.
- Set the Username value to be "NETWORKSERVICE" when using the Network Service* account, or the username of the custom web server account**.
- Open SQL Server Management Studio (SSMS).
- Expand Security > Logins and ensure that the appropriate account exists, creating the account if required.
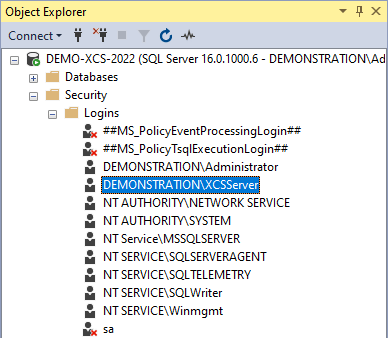
- "NT AUTHORITY\NETWORKSERVICE" when using the Network Service* account locally.
- "DOMAINNAME\ComputerName$" when using the Network Service* account over the network.
- The account name of the custom web server account**.
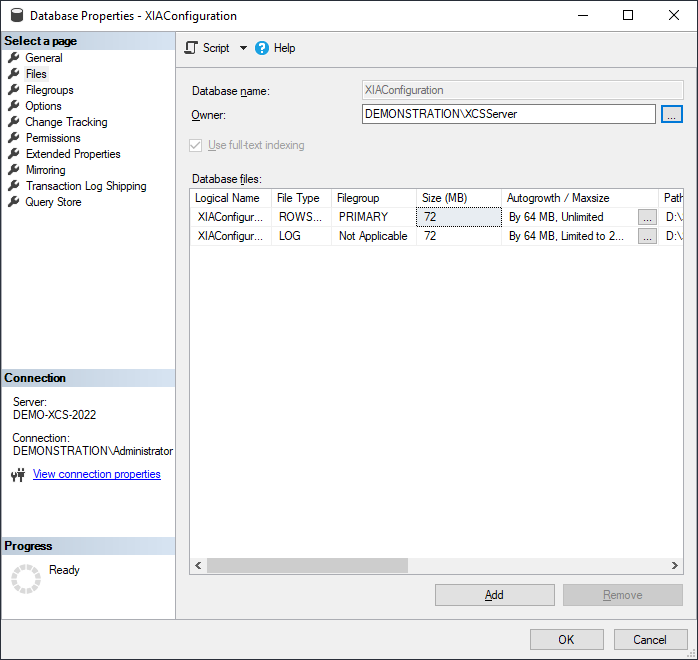
- Modify the properties of the XIA Configuration Server database, setting the owner to the server login from the previous step.
- Start the XIA Configuration application pool.
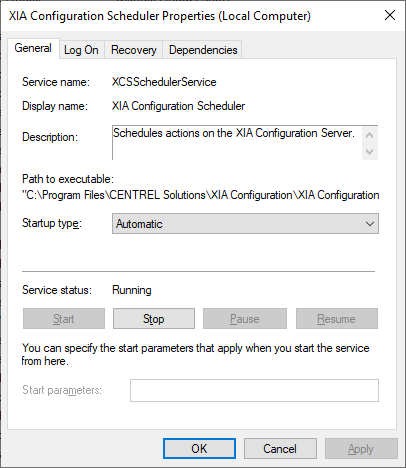
- Stop the XIA Configuration Scheduler service.
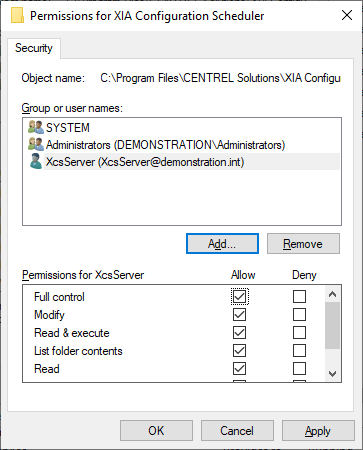
- Modify the NTFS permissions on the XIA Configuration Scheduler directory, this is located by default in the following location.
C:\Program Files\CENTREL Solutions\XIA Configuration\XIA Configuration Scheduler - Remove the previous web server account from the access control list, and ensure that the new web server account has full control.
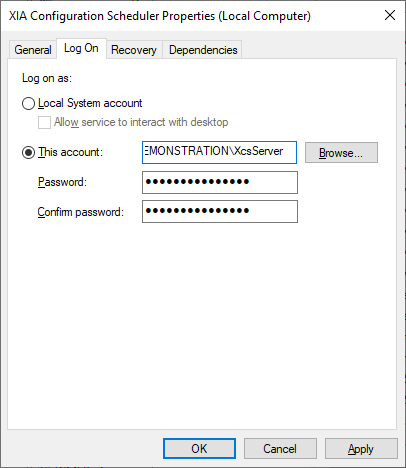
- Modify the logon properties and set to use the Network Service* account or account name and password of the custom web server account**.
- Start the XIA Configuration Scheduler service.
- Test that the XIA Configuration Server can be accessed through a web interface, and that scheduled tasks work as expected before proceeding.
* WARNING: The Network Service account name differs for non-English versions of Windows.
** WARNING: When the web server account is on a WORKGROUP use the local computer's NetBIOS name for the domain name.